Creación
-
Crearemos la primera máquina de nuestro escenario, será un contenedor LXC llamado router. Este contenedor se creará a partir de la plantilla Debian Bullseye. Este contenedor tendrá dos interfaces de red: la primera conectada a una red pública (bridge br0). Por esta interfaz el contenedor tendrá acceso a internet. Además estará conectada la bridge de un red muy aislada que crearás con virsh y tendrá como dirección IP la 10.0.0.1.
-
Primero creamos el contenedor llamado router y con debian bullseye
root@AlejandroGV:~/lxc# lxc-create -n router -t debian -- -r bullseye
- Ahora crearemos los bridge necesarios para esta práctica. para ello entraremos en el fichero de configuración del contenedor
/var/lib/lxc/router/configy añadiremos las redes y parametros necesarios.
# Arranque automático
lxc.start.auto = 1

# red very isolated
lxc.net.1.type = veth
lxc.net.1.link = virbr10
lxc.net.1.flags = up

lxc.apparmor.profile = generated
lxc.apparmor.allow_nesting = 1
lxc.rootfs.path = dir:/var/lib/lxc/router/rootfs

# bridge
lxc.net.0.type = veth
lxc.net.0.link = br0
lxc.net.0.flags = up

# Limitación de memoria y CPUs
lxc.cgroup2.memory.max = 512M
lxc.cgroup2.cpuset.cpus = 0 1

# Common configuration
lxc.include = /usr/share/lxc/config/debian.common.conf

# Container specific configuration
lxc.tty.max = 4
lxc.uts.name = router
lxc.arch = amd64
lxc.pty.max = 1024
- También creamos un contenedor llamado servidor_web. Este contenedor se creará a partir de la plantilla Ubuntu Focal Fossa. Este contenedor estará conectado a la red muy aislada con la dirección IP 10.0.0.2.
root@AlejandroGV:~/lxc# lxc-create -n servidor_web -t ubuntu -- -r focal
- Tambien debemos tocar la configuración de este contenedor en
/var/lib/lxc/servidor_web/config
# Arranque automático
lxc.start.auto = 1

# Limitacion d memoria y CPUs
lxc.cgroup2.memory.max = 512M
lxc.cgroup2.cpuset.cpus = 0

# Common configuration
lxc.include = /usr/share/lxc/config/ubuntu.common.conf

# Container specific configuration
lxc.apparmor.profile = generated
lxc.apparmor.allow_nesting = 1
lxc.rootfs.path = dir:/var/lib/lxc/servidor_web/rootfs
lxc.uts.name = servidor_web
lxc.arch = amd64

# Network configuration
lxc.net.0.type = veth
lxc.net.0.link = virbr10
lxc.net.0.flags = up
- Ahora iniciamos los contenedores.
root@AlejandroGV:~# lxc-start router
root@AlejandroGV:~# lxc-start servidor_web
Configuración
Router
- Iniciaremos configurando el contenedor router, para ello primero debemos conectarnos.
root@AlejandroGV:~# lxc-attach router
root@router:~#
- Debemos configurar su network interfaces añadiendo las interfaces necesarias y las reglas DNAT y SNAT.
auto lo
iface lo inet loopback

auto eth0
iface eth0 inet dhcp

auto eth1
iface eth1 inet static
        address 10.0.0.1
        netmask 255.255.255.0
        post-up iptables -t nat -A PREROUTING -p tcp -i eth0 --dport 80 -j DNAT --to 10.0.0.2
        post-up iptables -t nat -A POSTROUTING -s 10.0.0.0/24 -o eth0 -j MASQUERADE
- No nos olvidemos de activar el bit de forwarding.
root@router:~# echo 1 > /proc/sys/net/ipv4/ip_forward
- Para poder acceder por ssh creamos la carpeta .ssh en el home de root y añadimos nuestra clave pública al fichero authorized_keys.
root@router:~# cat .ssh/authorized_keys
ssh-rsa AAAAB3NzaC1yc2EAAAADAQABAAABAQDhKGfNpOprBjFwehhtoSpKu0iLgexhDFBqTzWOJ+nbDX8EUEswmokoc7Mn7j3GEgegeJQP+LzJujWgT7CG193eZn8c3/mMJkJr+aJHVvq9gbTP+qeNTh2esezK+tw+m6z41CvaFoyY/TeQTzcd6Q48TPh39wt1xUmcI9LHR/yV9LGY6ZK/vFwj5OLfQbN/kSz/coEPrxLqeejvU75fQ6Gh14mVe8wdK6ro3mifexzmjjPNLmzMlGxqDAswZ3+R1yk1mXLJSAp05Drnw1VLADMlYbCNh2+oodpmqiWL5HhjsOwrv/x/5PnQ/ZzG7/xPeea9mwmmXfP/lltyOgADd7gp alejandrogv@AlejandroGV
- Comprobamos que podemos acceder por ssh.
alejandrogv@AlejandroGV:~$ ssh root@192.168.1.93
The authenticity of host '192.168.1.93 (192.168.1.93)' can't be established.
ECDSA key fingerprint is SHA256:WIELet03fgqJrTZ7FOzSFuTB3ErycjC/FG6NCetXJLI.
Are you sure you want to continue connecting (yes/no/[fingerprint])? yes
Warning: Permanently added '192.168.1.93' (ECDSA) to the list of known hosts.
Linux router 5.10.0-13-amd64 #1 SMP Debian 5.10.106-1 (2022-03-17) x86_64

The programs included with the Debian GNU/Linux system are free software;
the exact distribution terms for each program are described in the
individual files in /usr/share/doc/*/copyright.

Debian GNU/Linux comes with ABSOLUTELY NO WARRANTY, to the extent
permitted by applicable law.
root@router:~#
Servidor web
- Procedemos a configurar el servidor web. Y comenzamos como lo hicimos anteriormente, configurando la interfaz de red en este caso al ser una máquina ubuntu en el fichero
/etc/netplan/10-lxc.yaml.
network:
  ethernets:
    eth0:
      addresses:
        - 10.0.0.2/24
      gateway4: 10.0.0.1
  version: 2
- Hemos vuelto a añadir nuestra clave publica a esta máquina, vamos a comprobar que podemos acceder por ssh a traves del router.
alejandrogv@AlejandroGV:~$ ssh -A root@192.168.1.93
Linux router 5.10.0-13-amd64 #1 SMP Debian 5.10.106-1 (2022-03-17) x86_64

The programs included with the Debian GNU/Linux system are free software;
the exact distribution terms for each program are described in the
individual files in /usr/share/doc/*/copyright.

Debian GNU/Linux comes with ABSOLUTELY NO WARRANTY, to the extent
permitted by applicable law.
Last login: Wed Jun  1 08:20:49 2022 from 192.168.1.54
root@router:~# ssh root@10.0.0.2
The authenticity of host '10.0.0.2 (10.0.0.2)' can't be established.
ECDSA key fingerprint is SHA256:C7XLFWVt8MBE9jRc4/Fm69v3gXYpKCrdwFCxyP3QyVQ.
Are you sure you want to continue connecting (yes/no/[fingerprint])? yes
Warning: Permanently added '10.0.0.2' (ECDSA) to the list of known hosts.
Welcome to Ubuntu 20.04.4 LTS (GNU/Linux 5.10.0-13-amd64 x86_64)

 * Documentation:  https://help.ubuntu.com
 * Management:     https://landscape.canonical.com
 * Support:        https://ubuntu.com/advantage

The programs included with the Ubuntu system are free software;
the exact distribution terms for each program are described in the
individual files in /usr/share/doc/*/copyright.

Ubuntu comes with ABSOLUTELY NO WARRANTY, to the extent permitted by
applicable law.

root@servidorweb:~#
- Instalamos el servidor nginx
root@servidorweb:~# apt install nginx
- Se servirá el contenido web en la carpeta
/var/www/pagina, carpeta que debemos crear y después añadir en el fichero/etc/nginx/sites-available/default.
root /var/www/pagina;
- Salimos del contenedor y lo modificamos añadiendo la siguiente línea para que se monte el directorio
/opt/paginade mi máquina anfitriona en el contenedor.
lxc.mount.entry=/opt/pagina var/www/pagina none bind 0 0
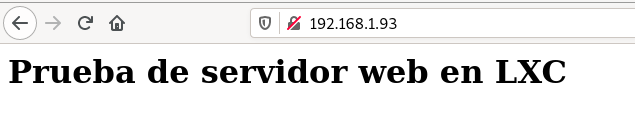
- Entramos en el servidor web desde nuestro navegador y comprobamos que se accede correctamente.